Happy Wednesday! I have an easy and lovely upcycled DIY for you today- DIY dried peony dreamcatchers. I am teaming up with the creative DIY team and this month we are all sharing repurposed projects, so be sure to also visit Brenda, Susan, and Cristina. It’s a funny thing in blog land because we all go crazy for peonies; am I right? It’s like they start blooming, and next thing you know they appear in all of our photos, our instagram shots, and anywhere else we can sneak them in. They’re beautiful, lush, and fragrant, so why wouldn’t we all adore them? The downside is that their bloom is fleeting… peony season never lasts long, and when it’s nearing the end all it takes is one strong storm to bring final peony doom (at least until the next year). This year I was inspired by my friend Carrie (whose lovely home I shot) to attempt to dry my peonies and see what happened. I clipped some of the remaining blooms before they were fully opened, some still just buds. I hung them from the antlers in my dining room and let them stay there for almost 2 weeks, until they felt like they were dried.
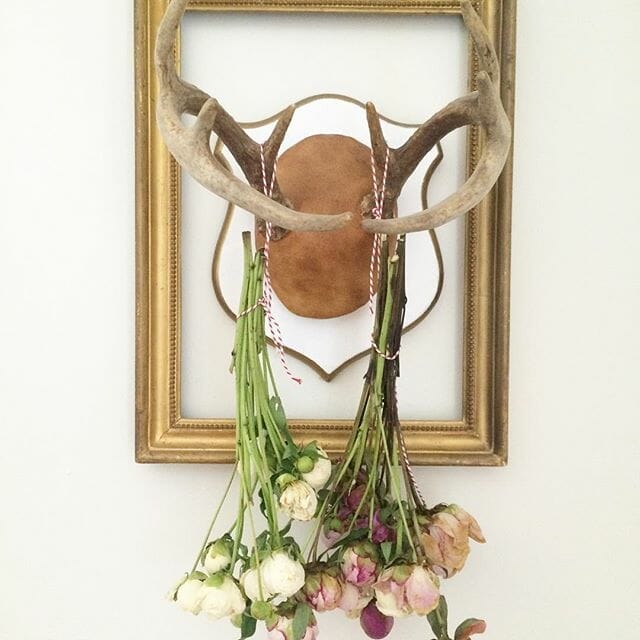 I actually really enjoyed having them on the antlers like that and thought it was a pretty addition to my decor just like that. At the time I had no idea what I would use them for, but knew that I wanted to see what would happen. They ended up drying just beautifully, and they still smelled lovely, too! I put them aside in a vase in the guest room until I had a use for them.
A couple of weeks ago, I mentioned having a really stressful week with losing our first 6 chickens. Apparently grief causes me to become super creative, and that week I burst with ideas. I’ve made dreamcatchers from vintage doilies before (you can also see some on my boho Summer porch), but I suddenly thought that the peonies would be a fun and romantic addition.
I used the following supplies, upcycling several items.
- Embroidery hoops (found for 10-25 cents each at yard sales and thrift shops)
- Vintage doilies (also found at yard sales for about $1 each)
- Scissors
- Vintage lace (found at yard sales; tip- church yard sales are great for this one)
- Ribbon found at thrift shop
- Hot glue gun
- Dried peonies
To begin, select a vintage doily and find an emroidery hoop that is a little smaller than the doily. Center and frame the doily in the hoop pulling tightly. Trim the excess off the back with scissors. If you prefer to seal the hoop, you can also run a line of hot glue along the back of the hoop to secure.
Next, cut lengths of ribbon and lace twice as long as you want them to hang down. Loop each one individually through the bottom of the hoop and doily, and knot them, allowing the long ends of each to cascade. Continue until you are satisfied. (Everyone has their own preferences and there’s really no right or wrong here.
Finally, trim the stems on the peonies, and lay out your design. Once you are content, start hot gluing them into place. You can also add the dried greenery if you prefer; I did.
I created two, the first one having pink peonies, and a touch of pink ribbon. Although I am typically not a pink person, I love the romance of this creation.
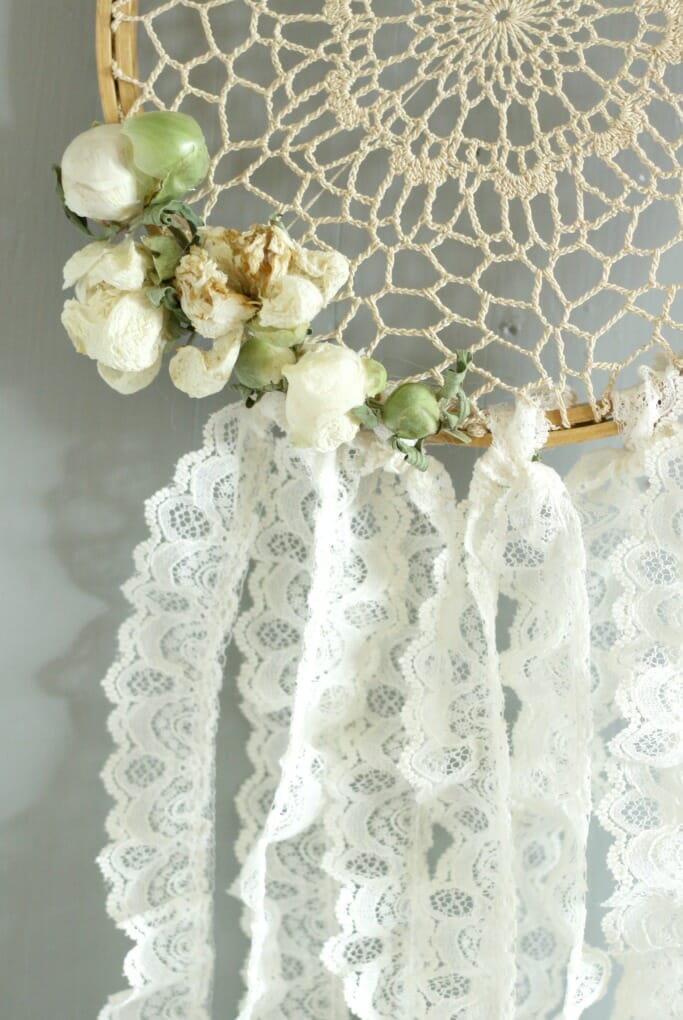
 As you can see, the larger the peonies, the more brown their petals turned. I still think they dried beautifully and I love the warmth the brown edges add.
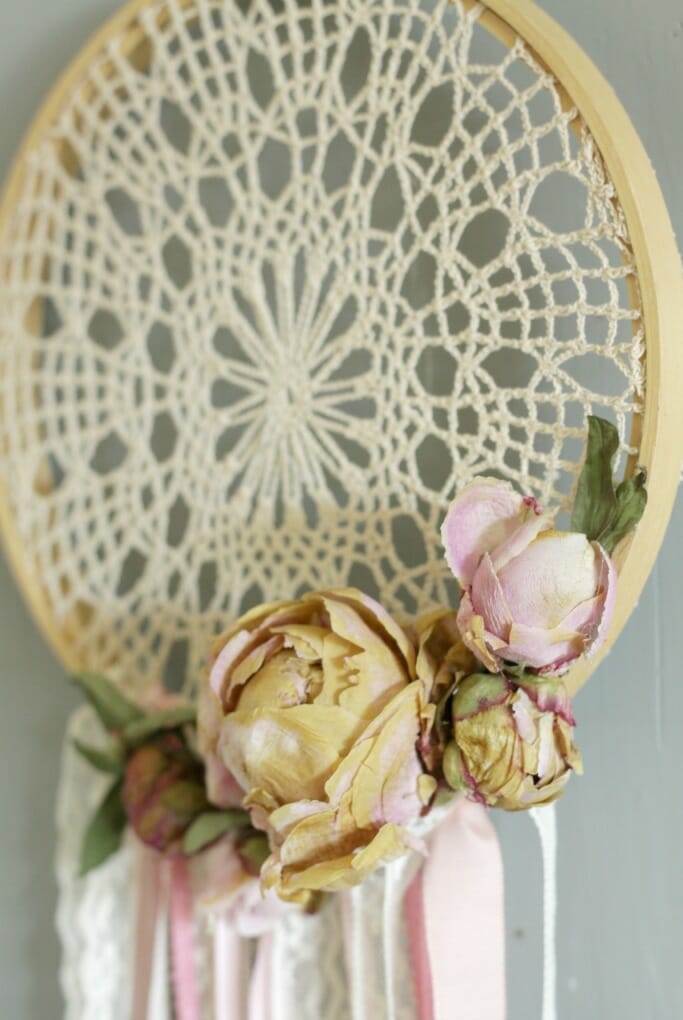
 And along the bottom you can see that I used a combination of lace and ribbon.
 The second one I created I decided to keep all white, and use only white peonies.
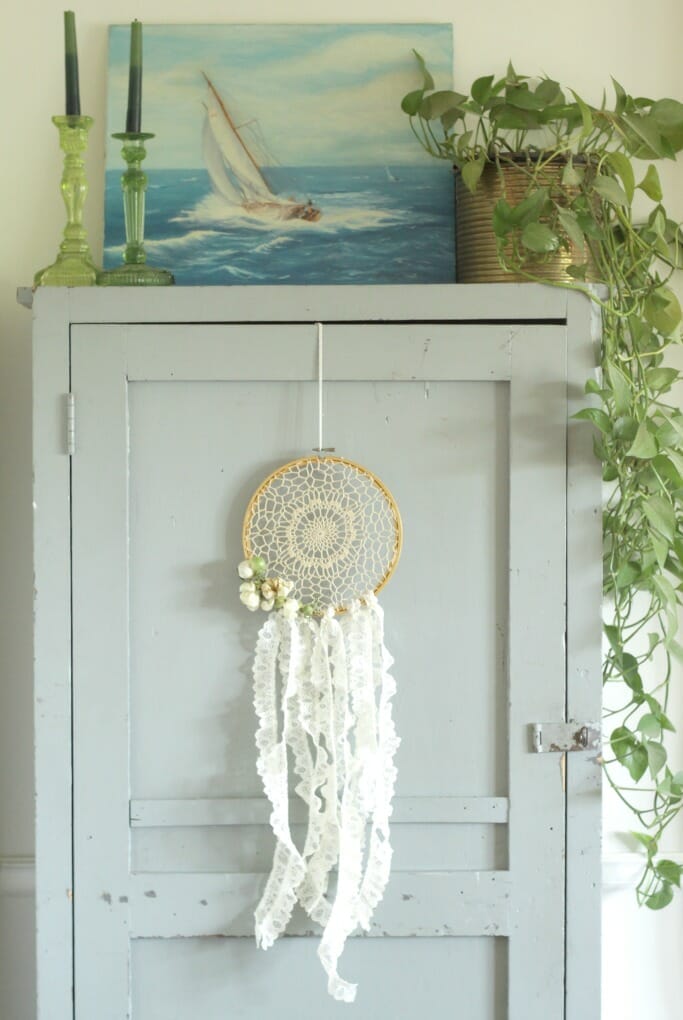
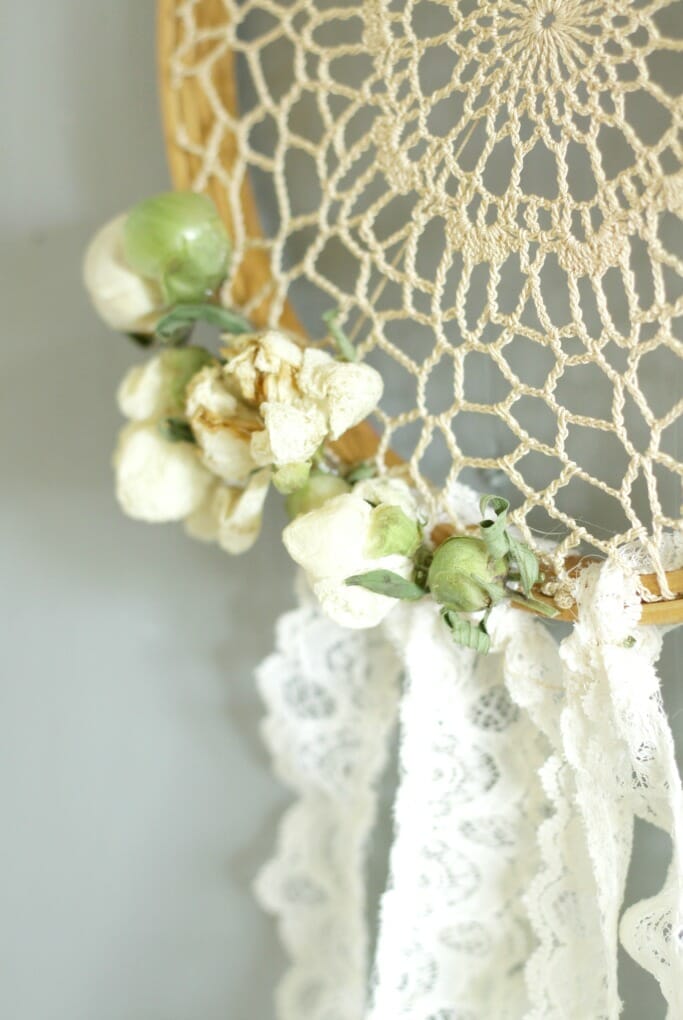 For the lace on this one, I used a trim lace which had more of a ruffled feel to it when it flowed downward.
 This was a really quick project and an easy and inexpensive way to add a romantic boho touch to your home. If you try it, I would love to see! Tag me on instagram at @cassiebustamante with your photos!

Now make sure to visit my Creative DIY Team friends and see what they’ve got for you. Here’s a little peek…

We hope you are inspired to repurpose something fun!
Sharing: