You guys… guess what I did this past weekend? If you guess sat on my tush and watched movies and drank lots of wine… you’d be wrong. First of all, I gave up wine for lent (and Chris gave up beer, so we are jus going totally 100% alcohol free!). And second of all, I found the most amazingly perfect mirror at the flea market. I call it the fire-starter mirror, because it lit the flame under my you-know-where and I came home and painted my master vanity! I am not going to share it today, but I wanted take a look back at the other two I have already painted in this house, and also share some inspiration.
This post was originally published on Ibby, but I am sharing it here now in light of my weekend warrior work!
When it comes to DIY I frankly don’t have too many skills aside from painting…. woodworking makes me nervous, tiling is a definite gray area, and the thought of upholstery makes me break out in a cold sweat. But put a paintbrush in my hand, and I am at ease. Over time, I have also mastered the art of working with what I have. Some may call it a skill; it was certainly achieved through practice, even if mostly through necessity. Thriftiness and painting capability are handy qualities when it comes to making over the bathrooms in my home.
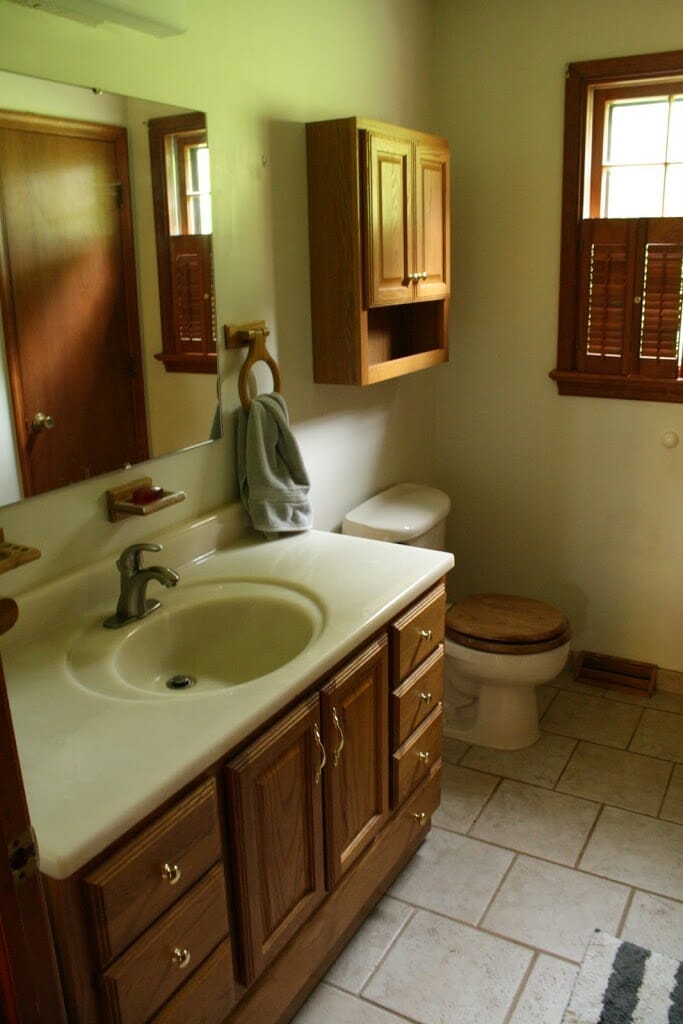
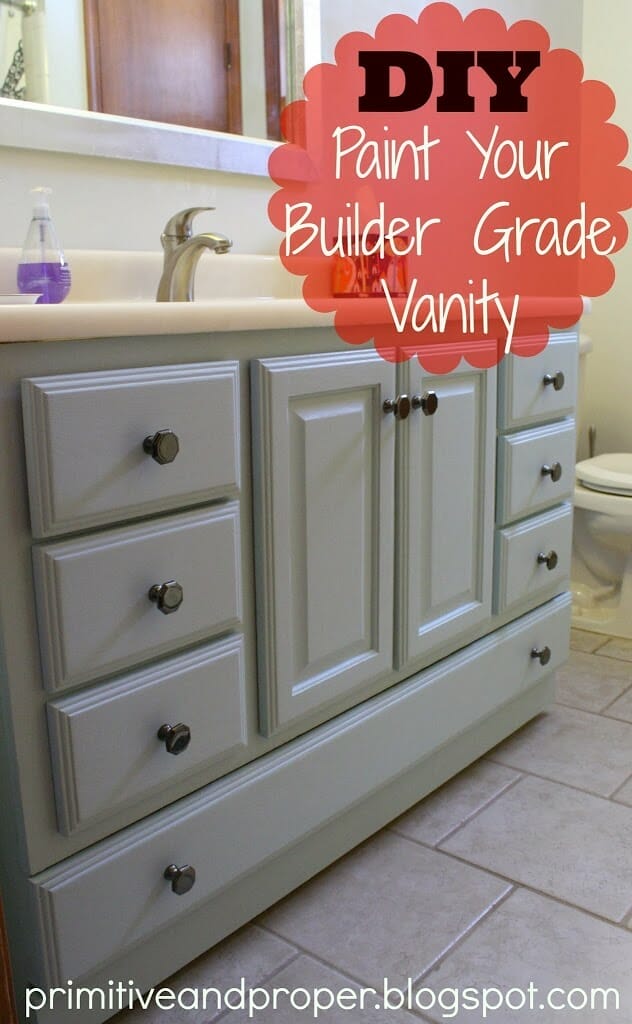
Our guest bath vanity started as a builder grade oak cabinet complete with shiny brass (not to be mistaken with the edgy cool brass of today) hardware. It was not necessarily hideous, but it lacked character and charm, and gave the room a dated feel. Wow, just check out all that wood; even the toilet seat complemented it.
I shared the steps I followed here, but basically all it took was some elbow grease and paint, and I brought the bathroom up to date.
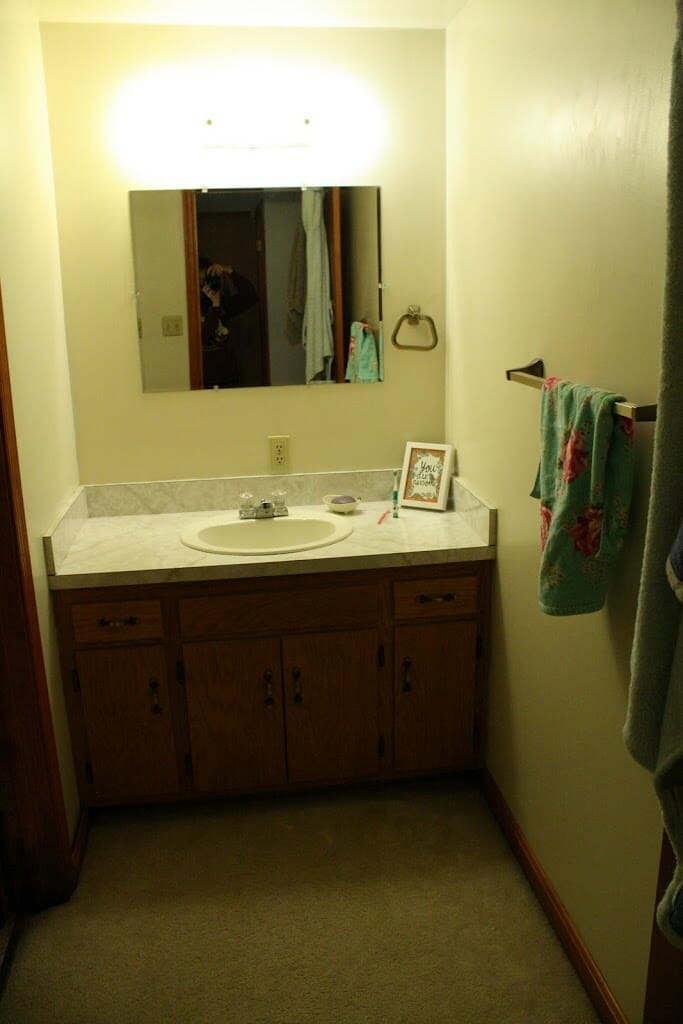
I again followed the same steps as I tackled my kids vanity cabinet. This vanity was even more outdated than the first, but with limited budget and two young kids using it, I didn’t want to invest much more than my time into this project.
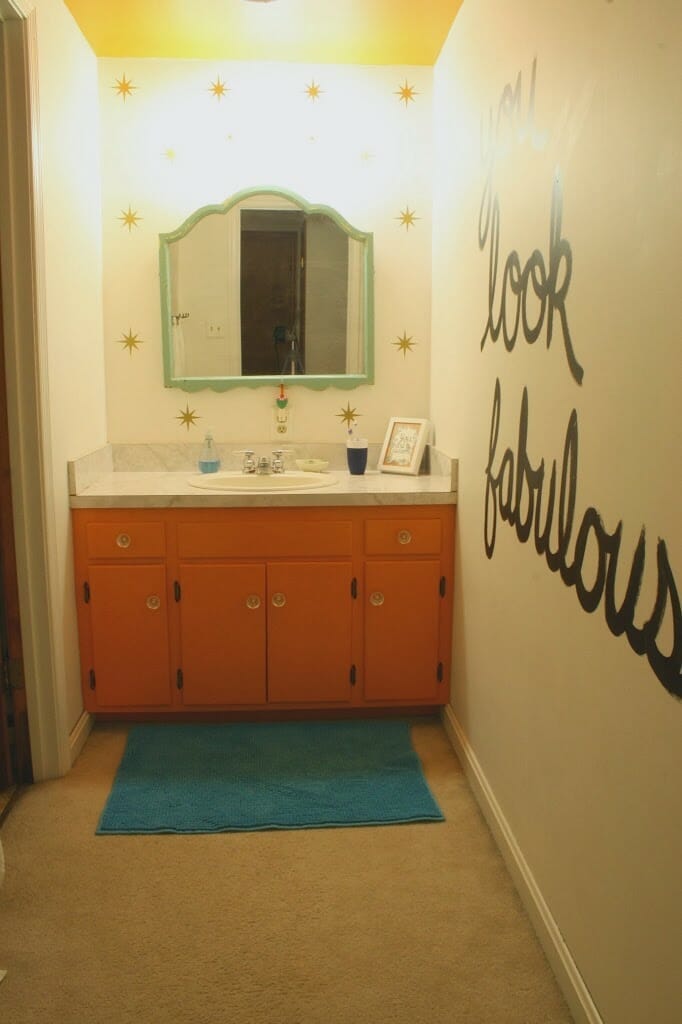
I chose a bright orange for a fun gender neutral pop of color, and also added a few other inexpensive elements such as the graffiti wall and gold star vinyls. Here is a look at the after:
Now we have just one vanity cabinet left…. I thought I would wait until we could afford to rehab the entire bathroom. But I’d like to make it at least easier on the eyes before my first and third graders head to college. Here is the remaining offender (photo taken on move in day, but trust me it hasn’t changed a bit).

This atrocious area sits right off the master bedroom, and I have grand plans to paint the cabinet black, pulling it into this decade! But let’s face it- even if I brought it into the last decade, it would be a huge improvement!
Looking around the web I found two amazing black vanity makeovers I am using as inspiration for my project. Kelly from A Swell Place to Dwell kept the funky original vintage hardware on her cabinet, and it now stands out against the sleek black finish, contributing to the bathroom’s overall eclectic vibe.

Kim from Newly Woodwards also painted her vanity in black and gave her bathroom a sophisticated cottage look.
These two examples differ stylistically, yet in both cases the black vanity serves to anchor and gives both spaces a more polished look.
My own bathroom will most likely be somewhere in between these two…. eclectic, vintage, and sophisticated rolled into one. I have both the mental and physical tools I need right here on hand…. now I just need to get to work!
As I said, this post was published on Ibby before I painted it. So now you just have to sit tight and wait for me to share its makeover!