DIY Painted Track Shelving
Waaaaay back in June I shared with you the plans for Sawyer’s modern teen bedroom. My goal was to have this space finished before the start of school, but we’re going to be wrapping it up later this month instead and we are all OK with that. We have been slowly chipping away at it and making progress, but the bed wasn’t able to be delivered in time, and the shelf brackets I had planned on getting were no longer available, so we had to make some adjustments. Our budget is really tight as the last month we’ve had several surprise expenses come up… you know like my car flooding, and our ductwork not installed properly, and our bathroom fan motor dying (which Chris was able to fix himself). I needed to come up with a plan B for the shelves that would suit our limited budget and still fit the modern teen vibe Sawyer was looking for. One of the most inexpensive and versatile shelving systems out there are track shelves which are often used in closets, but I knew we could make them look perfect in this space by choosing the right metal as well as painting them. Today I want to show you Sawyer’s DIY painted track shelving wall, and I have to admit it turned out so much better than I ever expected! (Thank you so much to Sherwin Williams for providing the paint for this post. I was not otherwise compensated. This blog uses affiliate links.)
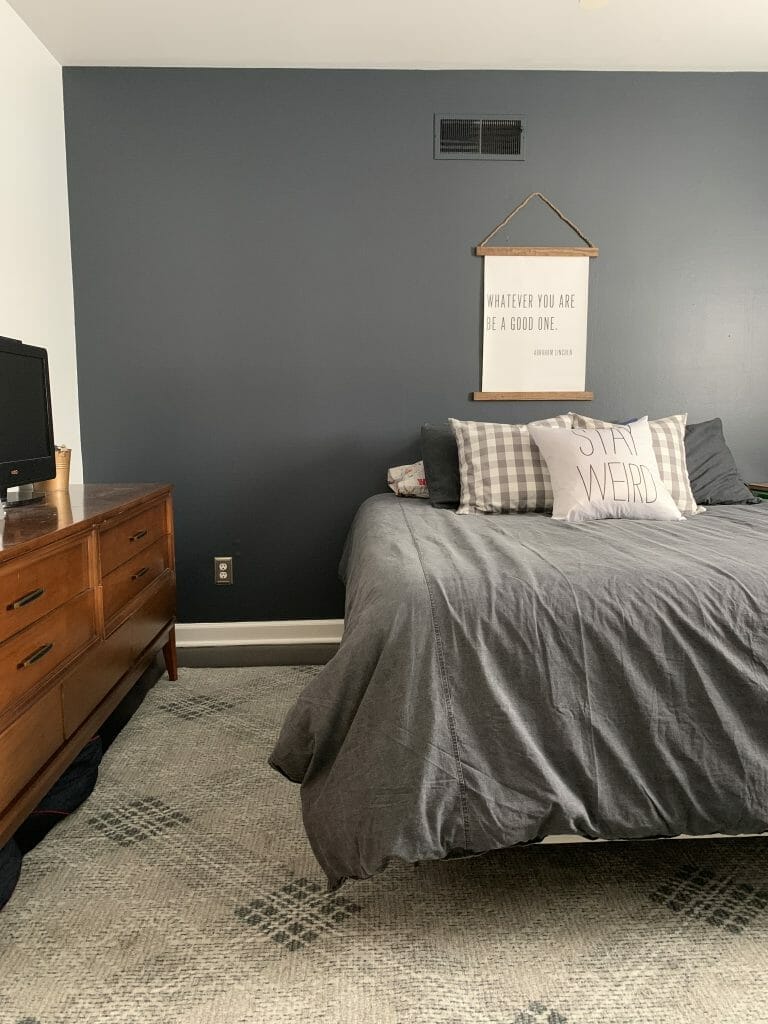
Back in August, Chris and I spent two weekends painting Sawyer’s bedroom. We first painted the back wall, which is Cyberspace by Sherwin Williams. It was the perfect cool charcoal, not quite black and with a hint of blue. The second weekend we painted the other three walls using my go to white from Sherwin Williams. We actually made Sawyer help a bit, but that just resulted in him rolling paint on the molding and getting it on the floor, and we only let him help with one coat because we have control issues. 😉 I shared a photo of it but to refresh your memory:
With his wall being such a dark color, I decided that black track shelving was the way to go. After searching everywhere online, I ended up finding the best prices for what we needed at Lowes. They had Blue Hawk brand black tracks and brackets for the most affordable prices. We ended up having to drive to a couple Lowes to get all of the brackets we needed (we needed 32) but we were able to do that.
Two weekends ago, we spent time just getting the tracks up. We had to find the studs on either side of the bed, and there was actually some visible nail pop which made finding them easier. We started in the corners of the room though because we knew there would be a room framing beam there that we could screw into. When using tracks, you definitely want to screw your tracks into the studs if you want them to stay put and not fall off the wall!
After finding the studs, we used a magnetic level and attached it to each track as we worked (see below) to make sure that we were hanging the tracks level. I used the drill and drilled all of the holes and then Chris went behind me placing all of the wood screws into the track and wall. While this part wasn’t hard, it was time consuming because we needed to make sure the tracks were level vertically, but also that they lined up with each other horizontally so that when brackets were placed at the same level on each track the shelf would be level.
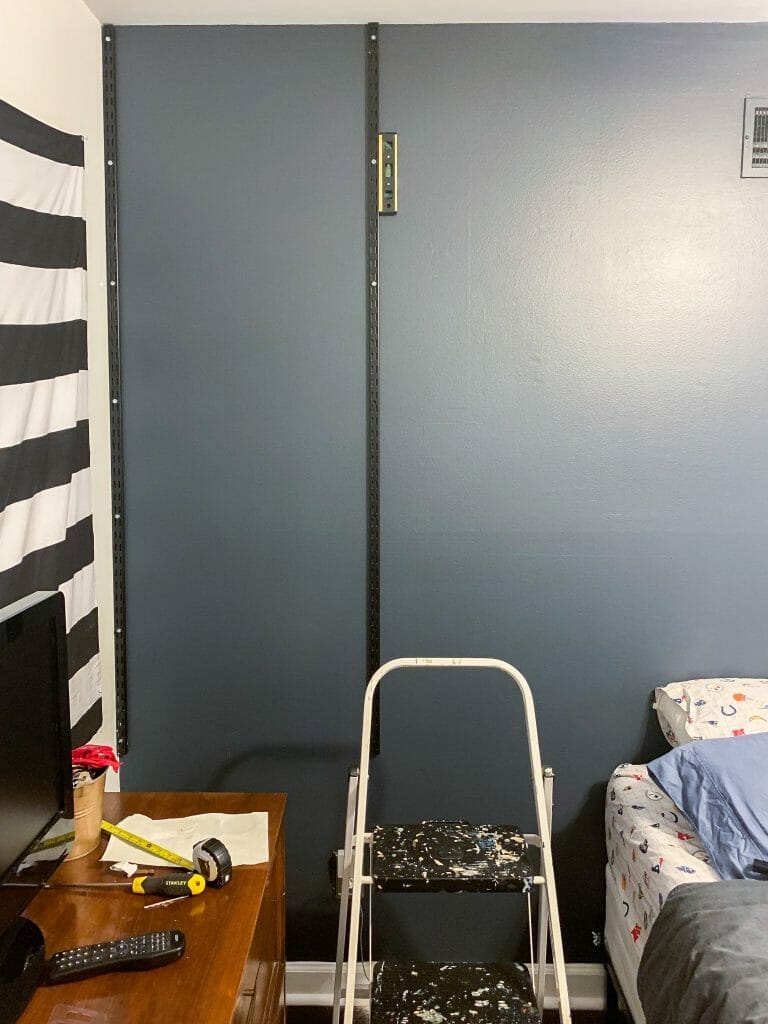
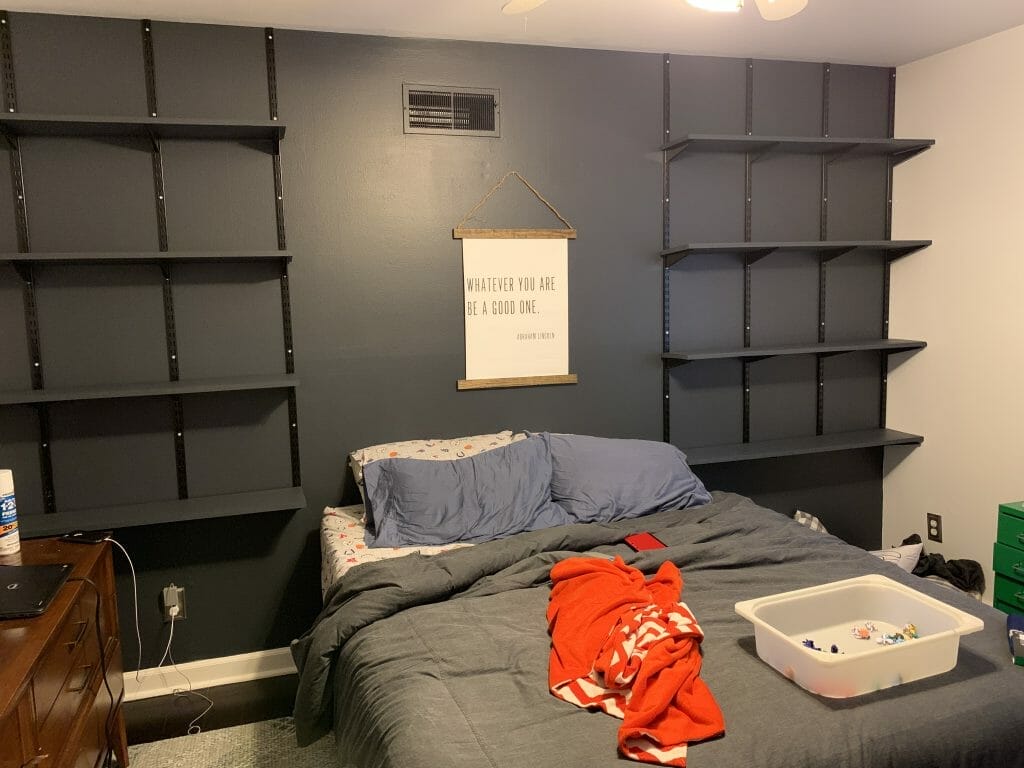
Before putting the tracks up, we had centered the bed on the wall. However, the stud placement caused us to move the bed a little bit so that we could maximize the use of studs, get the most stability, and also the most storage out of the wall. With our stud placement, we ended up with shelves 5’5″ shorter on the left side than on the right side.
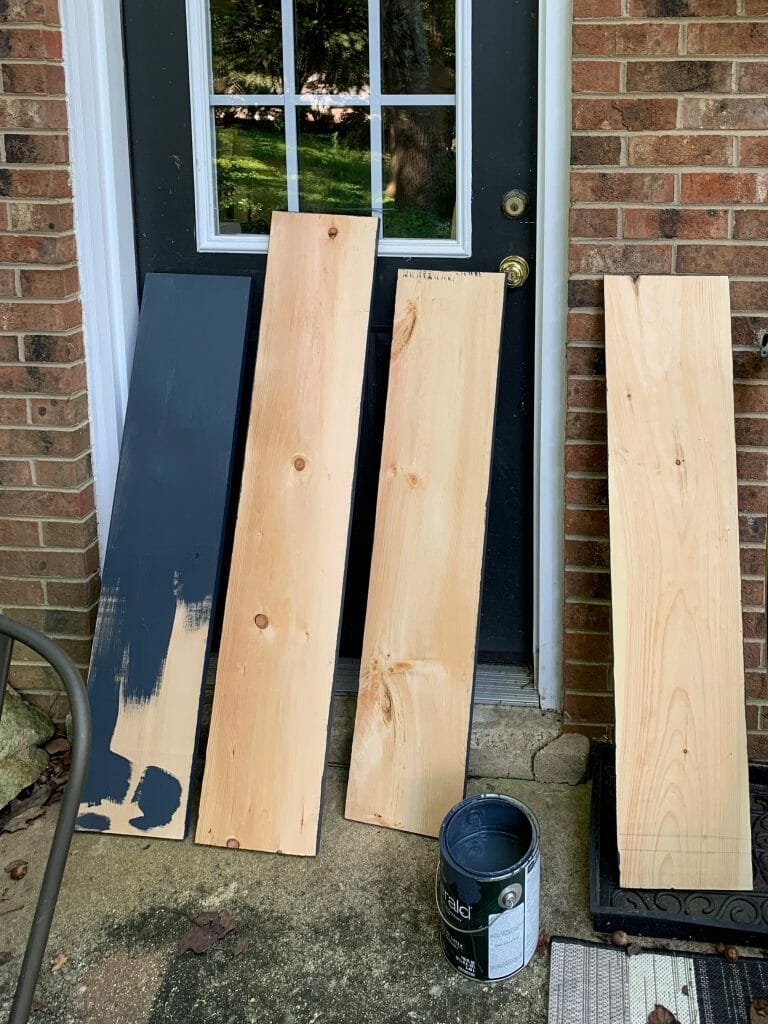
As for the actual shelves, we used simple common boards from Home Depot. On the right side we needed four 4′ shelves, and on the left we needed four 3’6.5″ shelves. Common boards come in 1″x 10″ x 8′ sections so we simply got 4 of those and had the friendly people at the store cut them for us.
Once they were cut, we took them home where I gave them a smooth sanding with my orbital sander, and then applied two coats of leftover wall paint, Cyberspace by Sherwin Williams. Since I was using a dark color and his room doesn’t get much natural light, I didn’t worry about priming these shelves first. It’s also a low humidity space.
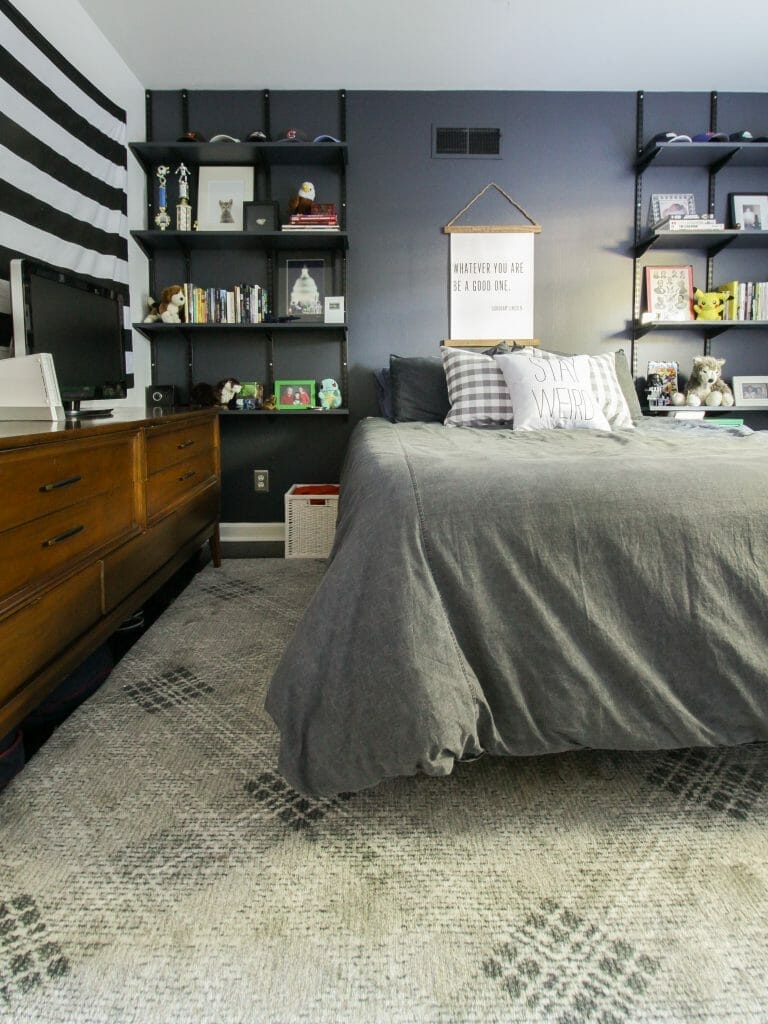
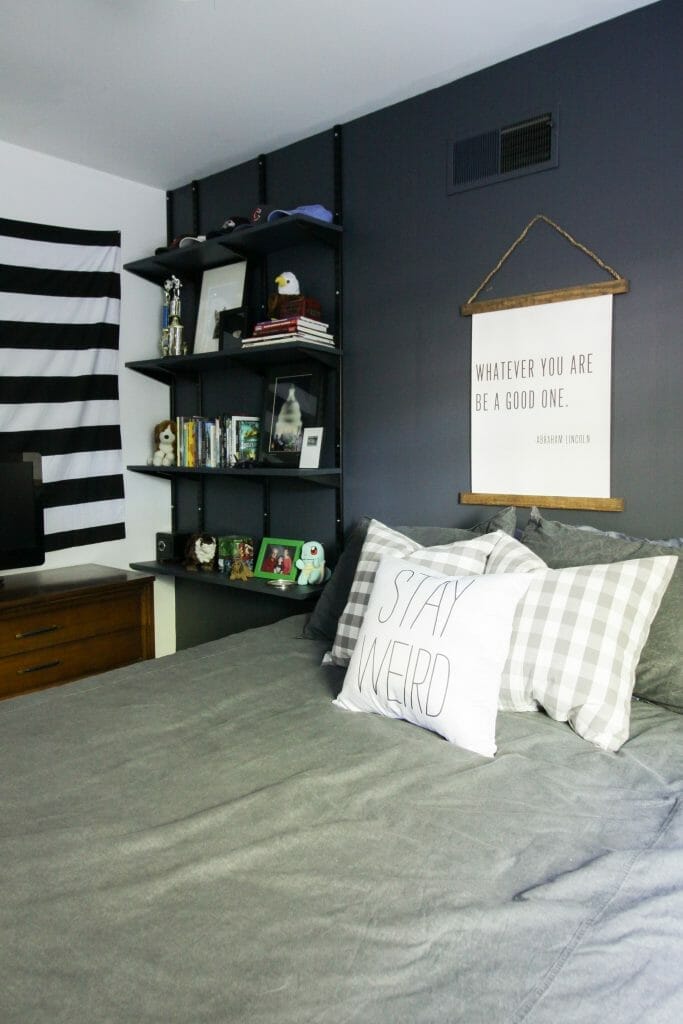
We let the paint dry, then went ahead and put them on the brackets just to finish setting in his room. Below you can see them empty in his bedroom, as well as the regular old mess of a teenage boy. You can also see that I hadn’t yet moved his artwork to be centered between shelves rather than on the wall. Additionally, you can see that we set the lowest shelf at a height to serve as nightstands for him.
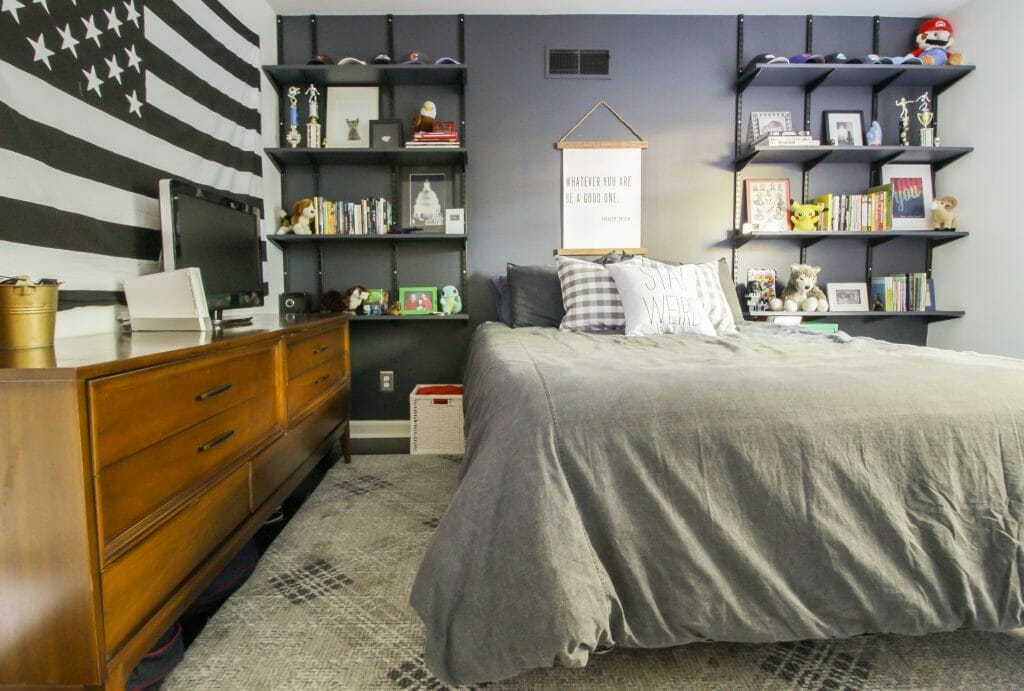
After they sat for a day, I got to work filling them with all of Sawyer’s things including books, photo memories, artwork, trophies, baseball caps, and some of his stuffed animals.
 bedding / rug / wall hanging / black and white flag / stay weird pillow / similar gray check pillows / lego vader clock
I would not exactly call his shelves “styled” because teenage boys generally love what they love, aesthetics aside, so I just worked with the things he had on hand.
I had anticipated needing to find Sawyer some bookends (and was actually scoping out these for my little American history lover), but the books actually sit well in between the tracks and we don’t need bookends as of now.
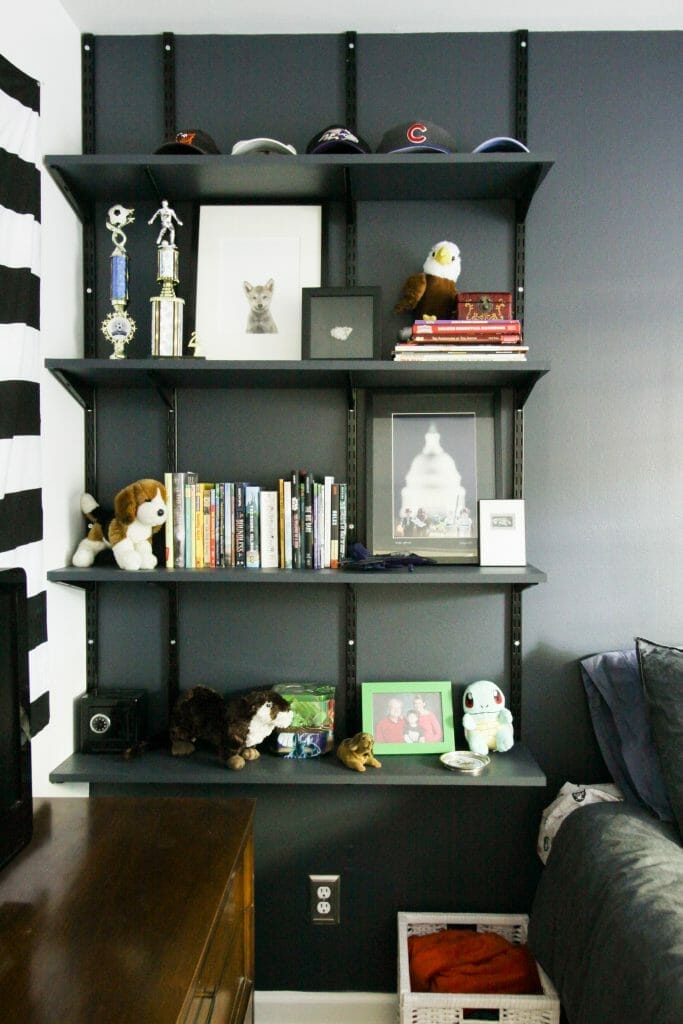
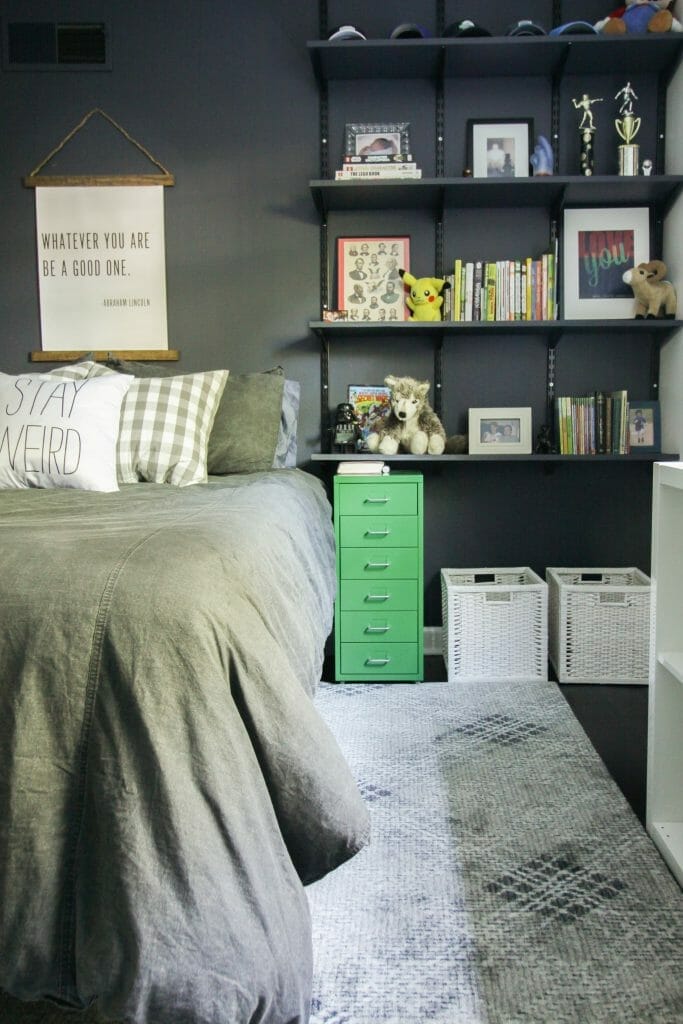
I asked Sawyer to come take a look when I was all done, and he was thrilled! He loves being able to see all of the memories there on his wall. I know it hasn’t been easy for my kids to move this past year, leaving behind the friends they knew for such a long time. These trophies are some that he earned with a soccer team he worked with and grew with for years, and I know that thinking of those friends makes him happy. His yearbooks from his old school, a photo from Grandparents day when he was in elementary school, and mementos from our family travels sit on these shelves. High school can be tough, and I want Sawyer to be surrounded by things that remind him of how loved he is.
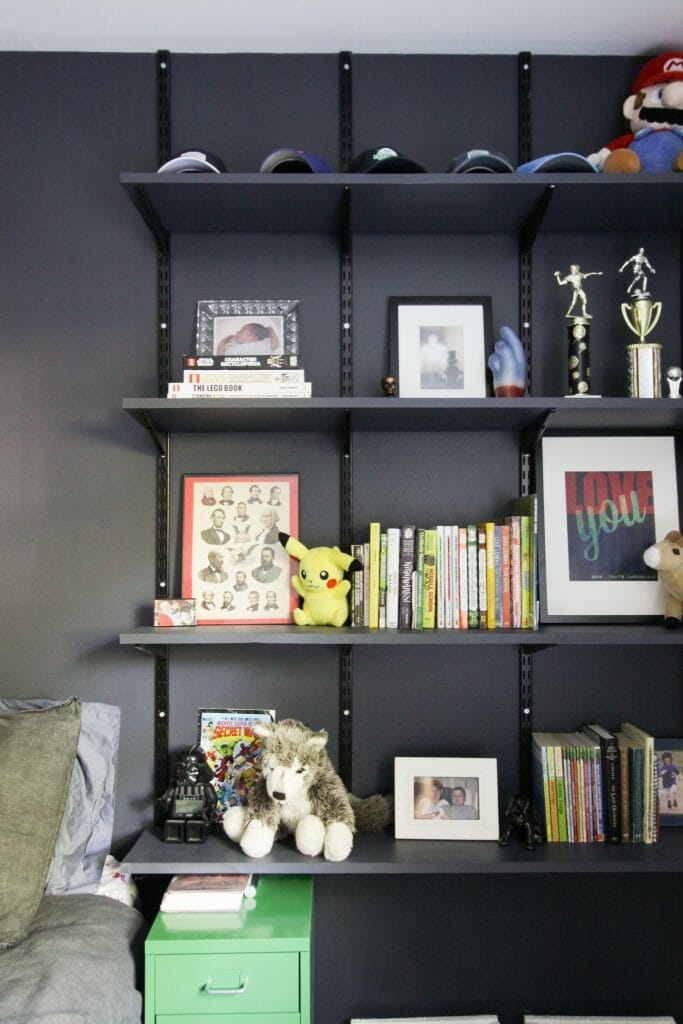 And of course, the art over his bed is there to remind him to just be a good person, and to put his whole self into whatever he decides to do with his life. It also happens to come from his favorite historical figure, Abraham Lincoln. You might have noticed Lincoln actually appears on these shelves 3 other times.
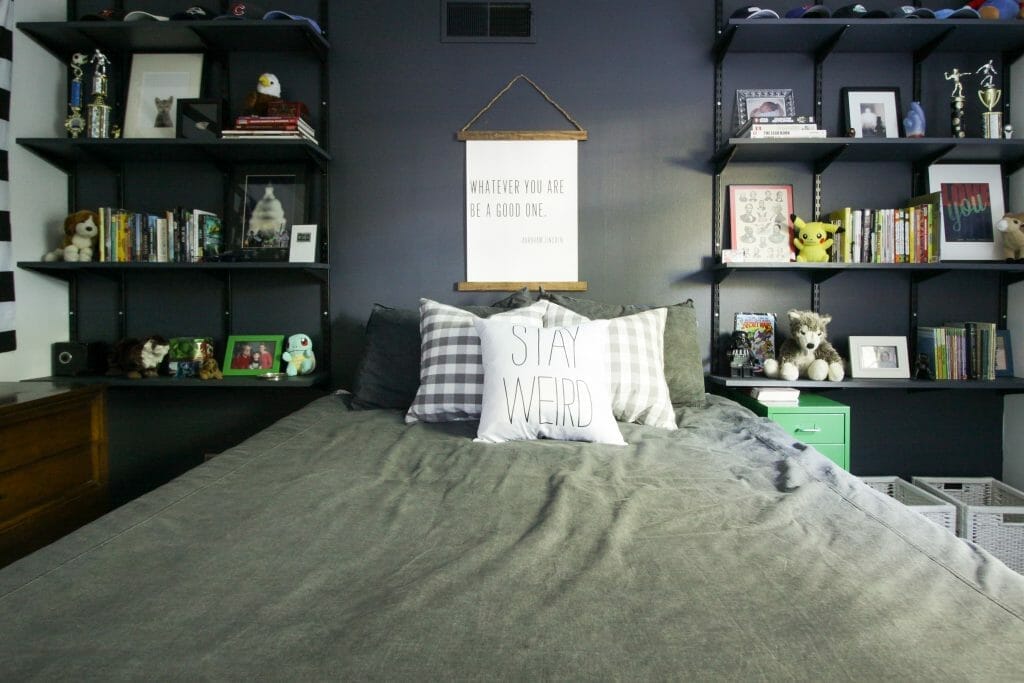 bedding / rug / wall hanging / black and white flag / stay weird pillow / similar gray check pillows / lego vader clock
Anyhow, I am really pleased with the impact this easy and affordable shelving option had on Sawyer’s bedroom and thrilled with our Plan B.
If you’d like to know our cost breakdown, here it is for you:
Black Tracks – $11.98 each x 8 = $95.84
Black shelf brackets- $4.18 each x 32 = $133.76
Pine boards- $16.62 each x 4 = $66.48
Paint- leftover so free
Grand Total- $296.08
 Now we’ve just got to get his bed in here, add some curtains, and hopefully a new fan at some point and he will be good to go!
This was just one project that we finished over the holiday weekend, and I have another super fun one to show you soon. Stay tuned!